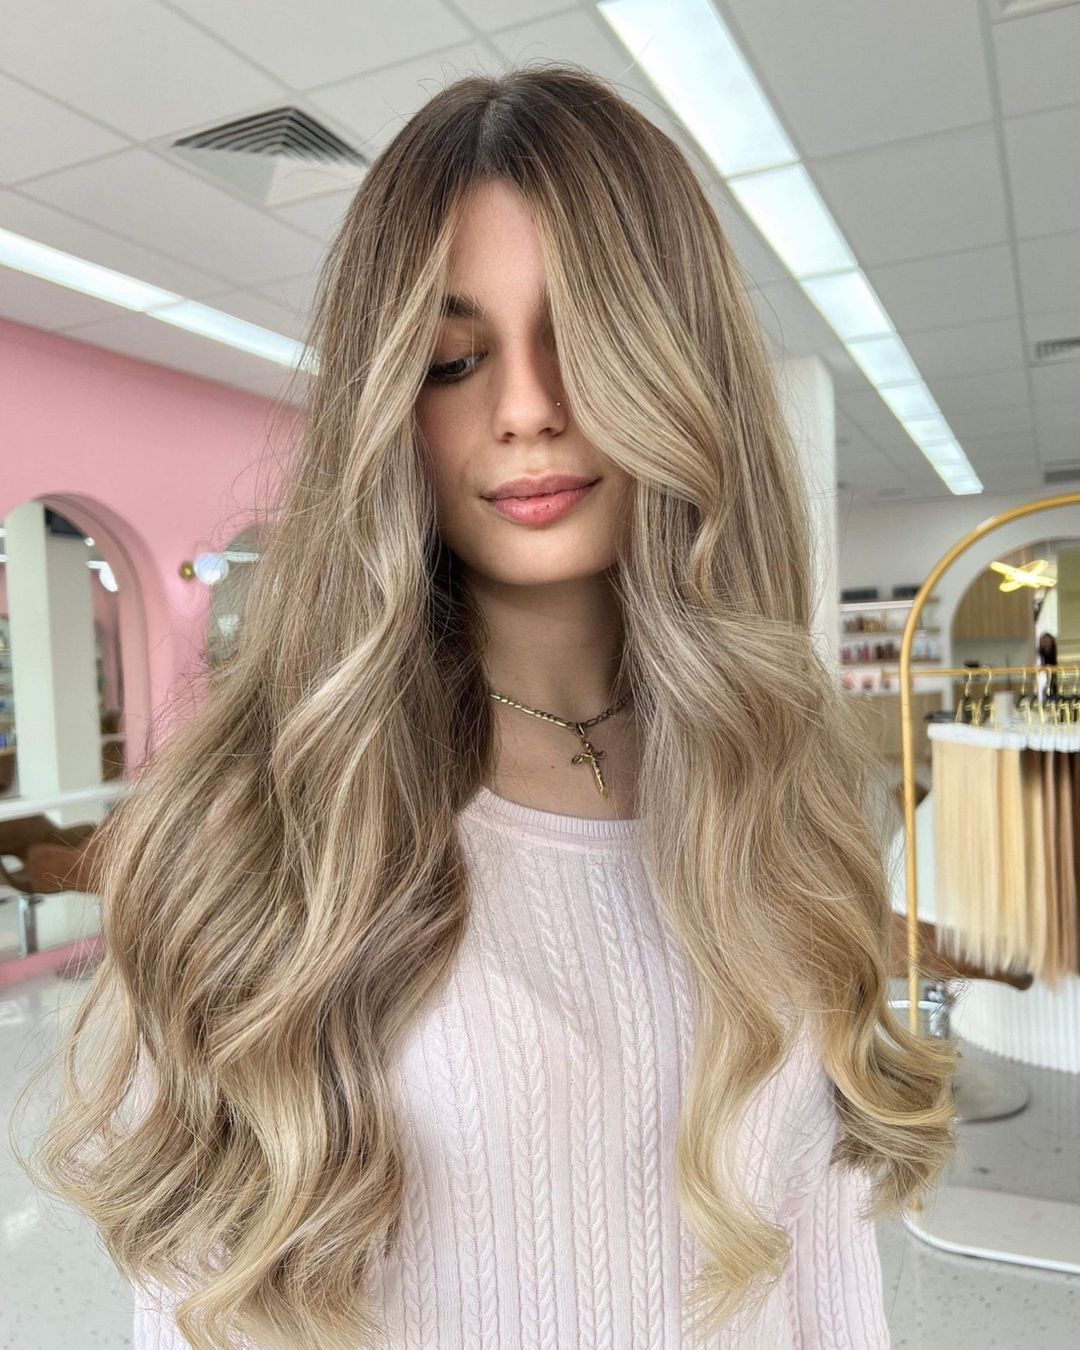
- Thinking About Dyeing Your Extensions at Home?
- Getting Ready for Dyeing Your Extensions at Home
- The Steps for Dyeing Your Extensions at Home
- After Dyeing Your Extensions at Home - What's Next?
Giving your hair extensions a fresh new color right from your own place can feel like a truly rewarding creative project. It offers a chance to make your look truly yours, whether you are aiming for a subtle shift or something much bolder. This way of doing things at home gives you a lot of freedom to play with shades and tones, letting you match your extensions perfectly to your natural hair or even try out a fun new style. It is, in some respects, a very practical way to get the exact shade you have been dreaming of without stepping out.
Doing this kind of color change for your extensions at home, you know, really opens up a world of possibilities for personal expression. You might be looking to refresh an old set that has faded a little, or perhaps you want to make a brand new set blend in just right with your current hair color. Maybe you are just feeling a bit adventurous and want to try a playful shade for a special event. Whatever your reason, taking on this task yourself means you have complete say over the final appearance. It also gives you a real sense of accomplishment, which is nice.
- Revenge Gifts By Mail
- Debbie Dumpling Newcastle
- Dixie Damelio Simpcity
- Brandon Marcel Williams
- Combi China
This guide is here to walk you through the whole process, helping you feel sure about each step. We will go over what you need, how to get everything ready, and the best ways to put the color on, so you get results that you are truly happy with. It is, after all, about making your hair dreams come true in a way that feels comfortable and doable right where you are. We will also talk a little about how dyes actually work their magic, which is pretty interesting, if you ask me.
Thinking About Dyeing Your Extensions at Home?
Before you even pick out a color for your extensions, it is a good idea to think about what kind of extensions you have. Are they made from real human hair, or are they synthetic? This makes a huge difference, actually, in how they will take color. Real human hair extensions behave a lot like your own hair, so they can typically be colored with regular hair dyes. Synthetic ones, on the other hand, are a different story; they usually do not take regular dye because of the materials they are made from. It is pretty important to know this distinction right from the start, so you do not end up with an unexpected outcome.
For those with human hair extensions, you have a lot more options. You can go lighter, darker, or even try out some vibrant fashion colors. The way the dye works with human hair is pretty neat, as it forms a lasting connection with the hair strands. This means the color tends to stay put for a good while, not easily washing out or fading from everyday things like sunlight. This sticking power is what makes a dye different from other things that just coat the hair with color, which is a key point to keep in mind.
- Fouls Start Chapter 17
- Bekka Miss Magnetic
- Black Jersey White Pants Football
- Jeremy Dufour Age
- Cloud Dreamy
If your extensions are synthetic, you might still be able to change their color, but it will require special products made just for synthetic materials. Regular hair dye just will not do the trick, as it will likely just sit on the surface or not change the color at all. So, before you get your heart set on a specific shade, make sure you know what your extensions are made of. This little bit of checking ahead of time can save you a lot of trouble, and honestly, some disappointment later on.
What Makes Dye Stick to Extensions?
Have you ever wondered what really makes a hair color stay put on your extensions? Well, it all comes down to how dye works. A dye, you see, is a colored substance that forms a chemical connection with the stuff it is being put on. This is what sets it apart from something like a paint or a pigment, which just sits on top without really joining up with the material. This strong connection is why the color from a dye is not easily changed by things like washing, heat, or even bright light. It is pretty cool, if you ask me.
When you are coloring your extensions, this special liquid goes onto the hair, and its tiny color bits actually get right into the hair strands. They become part of the hair itself, which is why the color lasts. This means the new shade becomes a true part of the hair, rather than just a coating that could chip or flake off. This lasting effect is what you are really aiming for when you color your extensions, so it is good to know the science behind it.
Dyes are generally made to dissolve in water and are put on in a liquid form, which makes them really good at getting into every little bit of the hair. This liquid nature helps the color spread evenly and get absorbed well, ensuring that your extensions get a consistent and beautiful new look. It is this ability to really get in there and stick that makes dyes the go-to for changing the appearance of hair in a lasting way, so that is pretty important.
Getting Ready for Dyeing Your Extensions at Home
Getting everything ready before you start putting color on your extensions is a really important step. It is kind of like preparing for any big project; having all your bits and pieces lined up makes the whole thing go much more smoothly. This means picking a good spot to work, gathering all the things you will need, and making sure your extensions are in the best shape to take on a new shade. It is, you know, about setting yourself up for success.
First off, choose an area that you do not mind getting a little messy. A bathroom or a kitchen counter covered with old newspapers or plastic sheeting works really well. You want to protect surfaces from any accidental drips or splashes, because dye, as we have talked about, forms a strong connection with whatever it touches. This means it can stain things permanently, which you definitely want to avoid. So, a bit of prep here can save you a lot of clean-up later, which is always a good thing.
Also, think about the lighting in your chosen workspace. Good, bright light is pretty essential for seeing what you are doing and making sure you are putting the color on evenly. Natural light is often the best, but if that is not an option, make sure you have plenty of overhead light. This helps you really see the color as it develops, which is, you know, a very important part of getting the shade you want.
Gathering Your Tools for Dyeing Extensions
To get your extensions colored at home, you will need a few things to help you along the way. Having everything ready before you start means you will not have to stop in the middle of things to go looking for something. You will need the hair color itself, of course, chosen for your type of extensions. Make sure you get enough, especially if you have a lot of hair to color. It is always better to have a little extra than to run out halfway through, which can be a real bother.
You will also want a non-metallic bowl for mixing the color. Plastic or glass bowls work well. Along with that, you will need a brush designed for applying hair color. These brushes typically have stiff bristles that help spread the color evenly. Some people find that a wide-toothed comb is also helpful for making sure the color gets through all the hair strands, so that is something to consider.
Do not forget some protective gear for yourself! Gloves are an absolute must to keep your hands from getting stained. Old clothes that you do not mind getting color on are also a good idea. Some people even put down old towels or plastic sheets on the floor around their work area, just to be extra careful. Having these things ready means you can focus on the coloring process without worrying about making a mess, which is pretty nice.
The Steps for Dyeing Your Extensions at Home
Once you have all your supplies laid out and your workspace is ready, you can start the actual process of coloring your extensions. This part needs a bit of care and patience, but it is not nearly as hard as it might seem. The key is to work in small sections and to make sure every bit of hair gets enough of the color mixture. It is, basically, about being thorough.
Always read the instructions that come with your chosen hair color product. Different brands and types of dye can have slightly different directions for mixing and how long to leave the color on. Following these instructions is very important for getting the best outcome and keeping your extensions in good shape. They are there for a reason, you know.
When you are ready to put the color on, hang your extensions up or lay them flat on a protected surface. Some people use a clothes hanger or a special stand for this. This helps you work on them without them moving around too much. Then, using your brush, start putting the color mixture on in small, manageable sections. Make sure you cover every strand from top to bottom, which is, you know, a very important step for even coverage.
How Do You Prepare Extensions for Dyeing?
Preparing your extensions properly before you put any color on them is a step that really helps the dye work its best. First, if your extensions are human hair, give them a gentle wash with a clarifying shampoo. This helps get rid of any product buildup, oils, or dirt that might be on the hair. You see, a dye forms a chemical connection with the hair itself, and if there is anything blocking that connection, the color might not stick as well or look as even. So, a clean surface is pretty key.
After washing, make sure the extensions are completely dry. You can air dry them or use a low heat setting on a blow dryer. Damp hair can sometimes dilute the color or make it harder for the dye to stick firmly. You want the hair to be ready to fully take in the color. This bit of drying time is, in some respects, just as important as the washing itself.
Once they are clean and dry, gently comb through the extensions to get rid of any tangles. This makes it much easier to put the color on smoothly and evenly, which means you are less likely to miss any spots. A tangled mess would make the coloring job much harder, so taking a few moments to get them nice and smooth is a very good idea. This preparation really sets the stage for a great coloring experience.
After Dyeing Your Extensions at Home - What's Next?
Once the color has had enough time to do its work, according to the instructions on the dye package, it is time to rinse your extensions. This part is pretty simple, but you want to be thorough. Use cool or lukewarm water to rinse the extensions until the water runs completely clear. This means all the extra dye has been washed away, and you are left with just the color that has joined with the hair strands. It is, basically, a very satisfying part of the process.
After rinsing, you might want to use a color-safe conditioner. This helps to close the hair's outer layer and lock in the new color, making it look shiny and feel soft. Leave the conditioner on for a few minutes, then rinse it out with cool water. This step is important for keeping the hair healthy and making sure the color stays vibrant for as long as possible. You know, a little extra care goes a long way.
Finally, let your extensions air dry, or use a low heat setting on a blow dryer if you are in a hurry. Once they are dry, you can style them as you normally would. You will likely be really pleased with the new look you have created all by yourself. It is pretty cool to see your vision come to life, and it is a good feeling to know you did it right there at home.
Keeping Your Newly Colored Extensions Looking Good
After all your hard work coloring your extensions, you will want to keep that new shade looking its best for as long as possible. The good news is that because dye forms a lasting connection with the hair, the color is not easily changed by everyday things. However, a little extra care can make a big difference in how long your extensions stay vibrant and fresh. It is, you know, about making the most of your effort.
When you wash your extensions, try to use products that are made for color-treated hair. These shampoos and conditioners are often gentler and help to protect the color from fading too quickly. Washing with cool water instead of hot water can also help keep the color locked in. Hot water tends to open up the hair's outer layer, which can let some of the color escape over time, so cool water is generally better.
Also, try to limit how often you use heat styling tools like curling irons or straighteners. High heat can sometimes make colors fade faster, even with dye that is meant to last. If you do use heat, always put a heat protectant product on your extensions first. This creates a barrier that helps shield the hair from the heat's effects. A little bit of prevention here can really help keep your extensions looking lovely for a long time, which is, you know, what we are aiming for.
- Brent Odom Brian Odom
- American Museum Of Natural History Wedding Cost
- 55 137 Pounds Female
- Revenge Gifts By Mail
- Puritex Cleansing Tablets