You know, getting your nails to look just right can feel like a bit of a project sometimes, can't it? We all want those pretty, polished fingers that seem to last and last, without too much fuss or chipping. For many people, finding a way to make their fingernails look good and stay that way has been a bit of a search, you know? It's about finding something that gives you a neat finish and holds up to daily life, something that feels good and looks great without a lot of extra work.
This is where a particular way of doing nails, often called "dipped nail art," really starts to get some attention. It's a method that promises a finish that feels strong and looks smooth, giving your hands a put-together appearance for quite a while. It's a different approach compared to some of the more common ways people get their nails done, and it has a few things that make it stand out. It's almost like a little secret for keeping your nails looking good without a lot of upkeep, which is that pretty appealing to a lot of us.
So, if you've been curious about how people get those neat, lasting nail looks, or if you're just looking for a fresh idea for your own hands, this way of doing things might just be what you're looking for. It's a simple idea, really, but it can give you some really nice results, helping your fingernails have that finished touch. We're going to talk a bit about what makes this way of doing nails what it is, and why so many folks are finding it to be a good fit for their own style and daily routines, actually.
- Bekka Miss Magnetic
- Powder Coating Carbon Fiber
- Black Jersey White Pants Football
- Tanning Shots Before And After
- So%C3%A3ar Que Vas En Un Carro Con Alguien
Table of Contents
- What Is Dipped Nail Art Really All About?
- How Does Dipped Nail Art Work?
- What Are The Good Things About Dipped Nail Art?
- Are There Any Things To Think About With Dipped Nail Art?
- Getting Ready For Your Dipped Nail Art Session
- Putting On Dipped Nail Art At Home
- Keeping Your Dipped Nail Art Looking Fresh
- Taking Off Your Dipped Nail Art When You're Ready
What Is Dipped Nail Art Really All About?
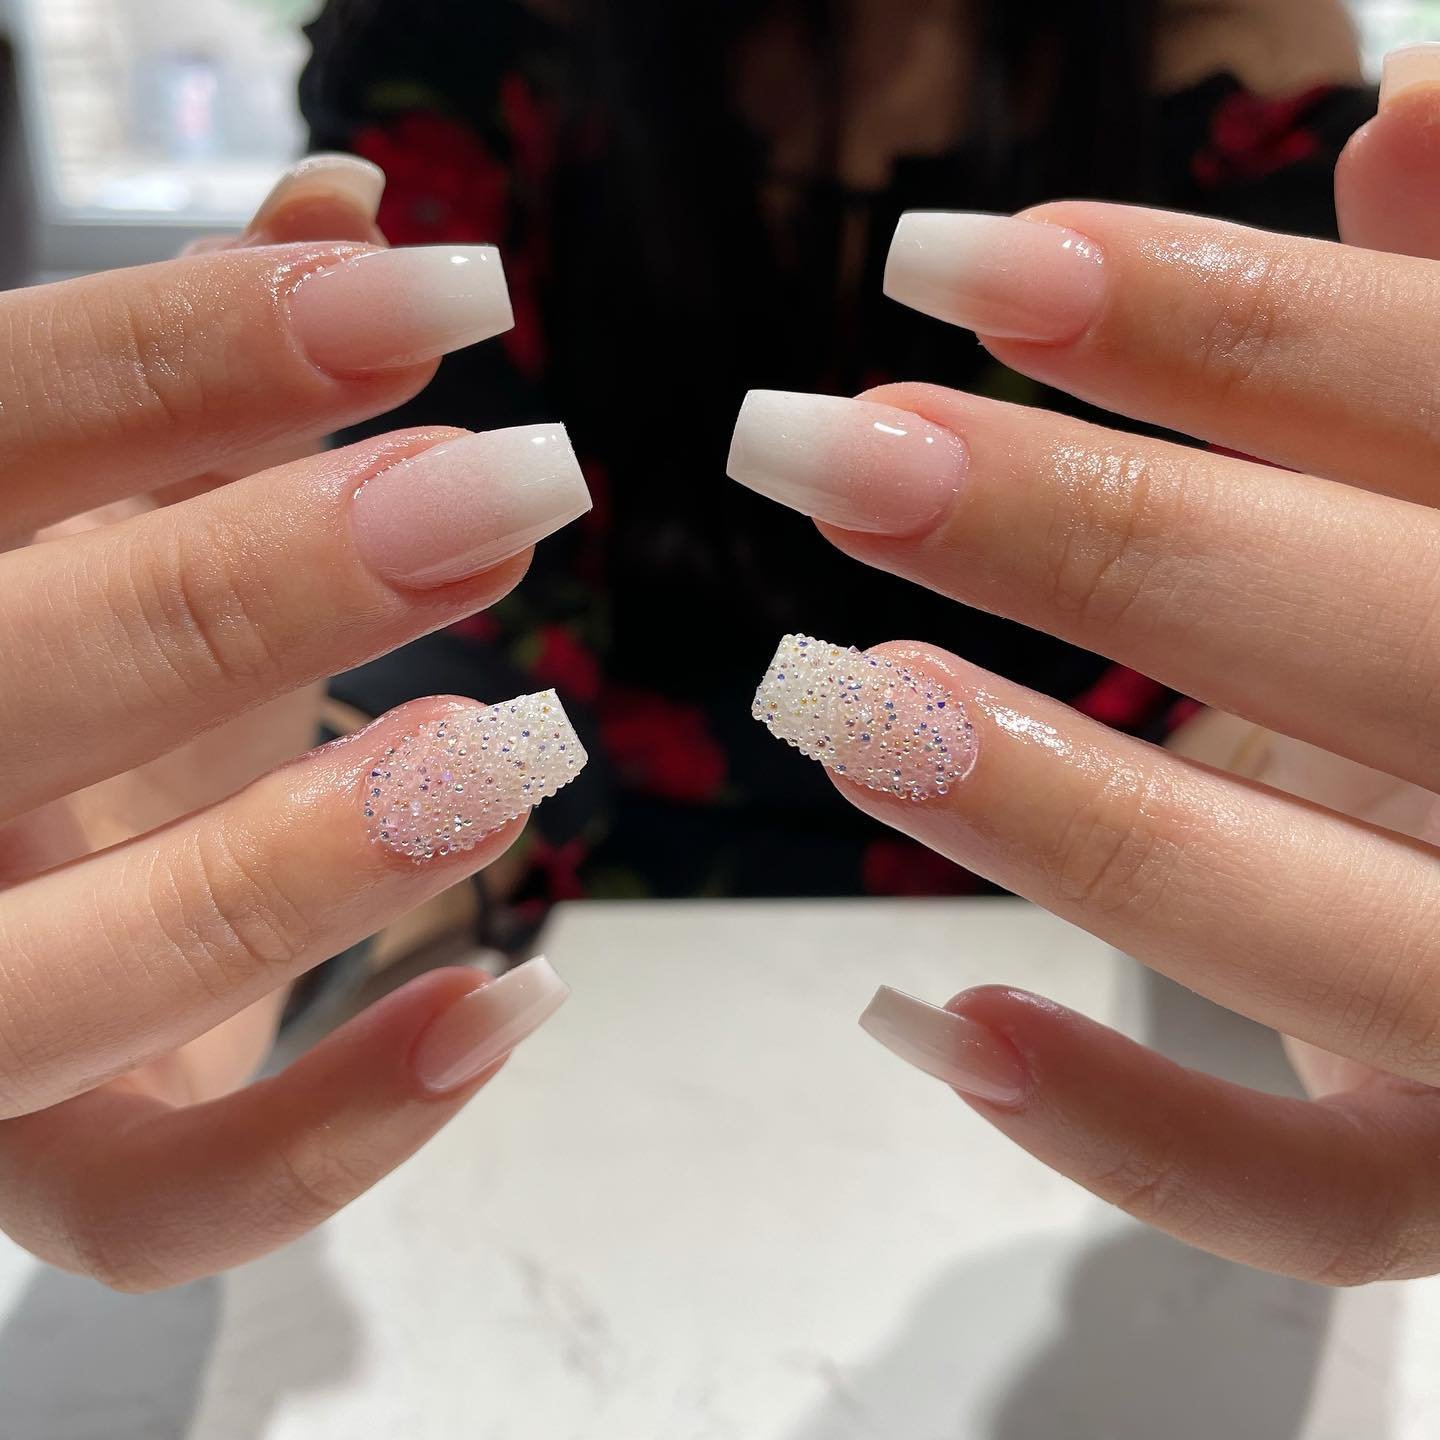
You might be wondering what this whole "dipped nail art" thing is, right? Well, it's a way of putting color and strength onto your fingernails without using a light to set everything, which is different from some other methods. Instead of brushing on a liquid polish and then curing it under a lamp, you actually put your finger into a pot of colored powder. It sounds a little unusual, I mean, but it's a pretty straightforward process once you get the hang of it. This powder then sticks to a special liquid base that you put on first, creating a layer of color and something that feels quite sturdy. It's a bit like building up layers of a very fine, colorful dust, which then gets sealed to make it last. This method tends to give you a finish that feels a bit thicker than regular polish but not as thick as some other types of nail coverings. It's a way to get a good, solid color on your nails that stands up to daily wear and tear pretty well, you know?
The idea behind "dipped nail art" is to give you a long-lasting look that resists chips and breaks, often for a few weeks at a time. It's a popular choice for people who want their nails to look neat and cared for without having to redo them every few days. The powders come in a huge range of colors, so you can get just about any shade you like, or even mix and match to create different designs. It's a pretty versatile way to express your style, actually. Some people really like that there's no strong smell often linked with other nail products, and that the process itself can be a bit quicker. So, in a way, it's about getting a durable, colorful finish on your nails with a process that's a little bit different from what you might be used to, but it works really well for many folks.
How Does Dipped Nail Art Work?
So, how does this "dipped nail art" process actually happen? It's a series of steps, and each one helps build up the strong, colorful layer on your nails. First off, your nails get prepared, just like they would for any other type of nail covering. This usually means making sure they are clean, shaped nicely, and that the surface is ready to take on the layers that are coming. Then, a clear liquid base is brushed onto each nail. This base is sticky, and that's important because it's what the powder will hold onto. It's basically the glue for the color, you know?
- Bubs Lounge Chair Dupe
- Alejandra Trevino Erome
- Dixie Damelio Simpcity
- A Los Cuantos D%C3%A3as Abren Los Ojos Los Perros
- Sleepless Nocturne Ep 2
Once that sticky base is on, you put your finger into a small container of finely ground colored powder. The powder clings to the wet base coat, covering the whole nail. After you pull your finger out, you usually tap off any extra powder that didn't stick, or brush it away. This step is repeated, often two or three times, to build up the color and make the nail covering stronger. After the color layers are put on, another liquid is brushed over the nail. This liquid helps to harden the powder, making it feel solid and ready for the next step. Finally, a top coat is put on, which gives the nail a nice shine and helps to protect everything underneath. This top coat dries on its own, without needing a light, which is a key part of this whole "dipped nail art" method. It's a fairly simple sequence, but it results in a very finished look that can last for quite a while, actually.
What Are The Good Things About Dipped Nail Art?
There are quite a few things people really like about getting "dipped nail art" done. For one, the lasting power is often a big draw. These nails tend to stay looking good for a longer time compared to regular nail polish, often for two to four weeks without chipping or peeling. That means less time spent redoing your nails, which is pretty convenient for busy people. Another thing is how strong it makes your own nails feel. The layers of powder and liquid add a protective covering that can help your natural nails grow out without breaking as easily. It's almost like a little shield for them, so they can get longer and feel more sturdy, you know?
Also, many people appreciate that there's usually no strong smell during the process, unlike some other nail treatments that can have a pretty noticeable odor. This can make the experience more pleasant for both the person getting their nails done and the person doing them. Plus, the process itself can be pretty quick. Since there's no need for a light to dry each layer, the whole thing can sometimes be finished faster than other methods. You put on the liquid, dip, and then move on, which is that pretty efficient. The finish you get is often very smooth and even, with a nice color that looks consistent all over the nail. So, in a way, it's a good choice for someone who wants a lasting, strong, and visually appealing nail look without a lot of hassle or strong smells, basically.
Are There Any Things To Think About With Dipped Nail Art?
While "dipped nail art" has a lot going for it, there are a few things to keep in mind, just like with any beauty routine. One point that comes up sometimes is the removal process. Taking off dipped nails usually involves soaking them in a liquid for a bit, which can take some time. It's not as quick as simply wiping off regular nail polish, and you need to be patient to avoid damaging your natural nails underneath. So, that's something to think about if you like to change your nail color very often, you know?
Another consideration is that if the application isn't done just right, or if the nails aren't prepared properly, you might run into issues like lifting or chipping sooner than expected. It's important that the person doing the nails, whether it's you or a professional, knows the steps well. Also, for some people, the thickness of the "dipped nail art" might feel a little different than what they are used to. It's generally thicker than a regular polish, and while this adds strength, it might feel a bit more noticeable on your fingers at first. So, it's not really a problem, but something to be aware of. Lastly, while many people find the lack of smell a plus, it's always a good idea to be in a place with some fresh air when doing any kind of nail work, just to be on the safe side, anyway. These are just small points to consider, but they are worth knowing before you try out this particular way of doing your nails.
Getting Ready For Your Dipped Nail Art Session
Before you even think about putting on "dipped nail art," a bit of preparation goes a long way to making sure your nails look their best and the product lasts. It's pretty much the foundation for a good outcome. First, you'll want to make sure your nails are completely clean. This means getting rid of any old polish, oils, or dirt that might be hanging around. A good wipe down with a nail cleaner or even just rubbing alcohol can help with this. Then, you'll want to shape your nails the way you like them, using a file to get the edges smooth and even. This is where you decide on the overall look, you know?
After shaping, it's a good idea to gently push back your cuticles. You can use a special tool for this, or even just a soft stick. The idea is to clear the nail plate so the product can stick well to the actual nail, not to the skin around it. If there's any loose skin on the nail surface, you can gently remove it. This step is pretty important because if the product gets on your skin, it might lift off the nail later on. Finally, you might want to lightly buff the surface of your nails. This creates a slightly rougher texture, which gives the base liquid something extra to hold onto. It's not about making your nails thin, just about creating a little bit of grip. So, taking these few moments to get your nails ready will really help your "dipped nail art" look good and stay put for a nice long time, basically.
Putting On Dipped Nail Art At Home
If you're thinking about trying "dipped nail art" at your place, it's definitely something you can do. It takes a little practice, like most things, but the steps are pretty clear. You'll want to have all your stuff ready before you start: the base liquid, the colored powder, the activator liquid, and the top coat. Also, a soft brush to dust off extra powder is very helpful. First, you put a thin layer of the base liquid on one nail. Make sure it covers the whole nail but doesn't get onto your skin around the edges. Then, immediately, you put your finger into the colored powder, making sure the whole nail gets covered. You pull it out, give it a gentle tap to shake off any extra, and then you move on to the next nail, you know?
Once you've done all your nails with the first layer of base and powder, you repeat the process for a second coat, and sometimes even a third, depending on how much color and strength you want. After your last dip, you'll brush off all the loose powder from your nails. Then, you put on a layer of the activator liquid. This is the stuff that makes the powder harden up. You let that sit for a minute or so to do its work. After that, you can lightly buff your nails if they feel a little bumpy, just to smooth things out. Finally, you put on two thin layers of the top coat, letting each one dry for a bit before putting on the next. This gives your "dipped nail art" that nice shine and seals everything in. It's a bit of a sequence, but it's pretty straightforward once you get into the rhythm of it, and you'll have a good looking set of nails when you're done, actually.
Keeping Your Dipped Nail Art Looking Fresh
Once you've got your "dipped nail art" looking great, you probably want to keep it that way for as long as possible, right? The good news is that these nails are pretty tough, but there are a few simple things you can do to help them stay looking fresh. One of the main things is to be a little bit careful with your hands. While they're strong, banging them around or using them as tools can still cause chips or breaks. So, try to remember to use gloves when you're doing things like washing dishes or cleaning with harsh stuff. That's a pretty easy way to protect them, you know?
Another helpful tip is to keep your cuticles and the skin around your nails moisturized. Using a little bit of cuticle oil or hand cream every day can make a big difference. It helps keep the skin soft and healthy, which in turn helps your "dipped nail art" look better for longer and prevents the edges from drying out and lifting. Also, try to avoid picking at your nails or using them to pry things open. That's a sure way to cause damage. If you notice a tiny chip, sometimes a clear top coat can help seal it up for a bit longer, but usually, it means it's getting close to time for a new set. Basically, a little bit of care and attention will help your beautiful "dipped nail art" stay looking good for its full lifespan, pretty much.
Taking Off Your Dipped Nail Art When You're Ready
When it's time to change up your look or give your nails a break, taking off "dipped nail art" needs a bit of patience and the right method. You can't just peel it off, as that might damage your natural nails underneath. The main way to get it off is by soaking. First, you'll want to gently file the top layer of your "dipped nail art." This isn't about filing all the way down to your natural nail, but just breaking through the shiny top coat. This helps the soaking liquid get to the layers underneath more easily, you know?
After that, you'll need some pure acetone. You can soak cotton balls in the acetone, put one on each nail, and then wrap your fingers in foil to keep the cotton in place and the acetone from evaporating too quickly. You'll need to let your fingers sit like this for about 10 to 15 minutes. It might feel a little cool, but it's doing its job. After that time, you can gently push off the softened "dipped nail art" with a wooden stick or a soft pusher. Don't force it if it's not coming off easily; just re-soak for a few more minutes. Once all the product is off, wash your hands and put on some good hand cream or cuticle oil, as acetone can make your skin a bit dry. It's a process that takes a little time, but doing it correctly will keep your natural nails healthy and ready for your next beautiful look, basically.
- Black Jersey White Pants Football
- Andrea Alexander Md Husband
- Brandon Marcel Williams
- Accidente En Lincoln Hoy
- Sleepless Nocturne Ep 2